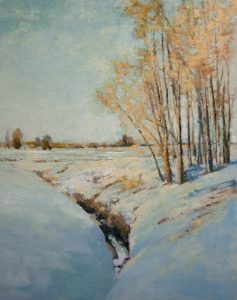
Tuesday, December 18, 2012

Classes starting in January through March 2013


INTERMEDIATE AND ADVANCED PAINTING CLASSES STARTING FOR LOCAL ARTISTS - UTAH

Intermediate and Advanced Classes are starting in January - March that are directed toward taking your painting skills to the next level!  I have attended classes and workshops and learned so much in the last year and would like to share the information I have learned and assimilated into my own work.

The classes will explore composition and spatial relationships, palettes, value patterns, edge quality and expressing emotion in your work. We will also explore the business aspect of art, putting together a great statement, resume and portfolio and how to approach galleries, museums, etc. We will cover self representation and social media for selling your art.  I am a landscape painter, but I have my education in figure work, I have extensive art history and can work and critique any genre. You can check out my FB or my webpage to see my work and Southwest Art Magazine August 2010, and Western Art Magazine August 2010 as well. My objective as a teacher is to push you to the next level while maintaining your own voice, style and expression.  Classes are held 2-3 hours each class once a week with exact schedule to be decided soon, $75 per month.  

If you or anyone you know or paint with is interested, please have them email me or call me at (801) 389-2369.  Hope to hear from you soon!


Shanna Kunz

Friday, December 14, 2012

A Better Newsletter - 2013!

     I know it's a bit early, but one of my New Years resolutions this year is to take better care of my newsletter followers!  I will be giving a First Look, First Chance for purchase opportunity for the newest works,  as well as special dates and events for shows, classes and exciting news throughout the year.  I will also be including a special section discussing helpful hints and art history for my art friends and students that follow.  Please feel free to make suggestions and requests as I re-imagine and re-invent this most powerful tool to communicate with my much-loved friends and clients!

     As I have in the past, my blog will continue to celebrate a well-rounded life with art, cuisine, gardening and other much-loved past times and hope you all enjoy!

Shanna


Monday, December 10, 2012

Parmeson Crusted Halibut over Lobster Ravioli in a Shiitake Cream Sauce with Roasted Asparagus


 Parmesan Crusted Halibut, Roasted Asparagus and Lobster Ravioli in a Shiitake Cream Sauce
Originally posted from Tumblr Ratchetesque but with Chicken instead of Halibut

**Timing tip: coat the halibut first, and stick in the fridge while you do everything else. then start on your sauce mixture as this takes the longest to cook out of all three elements. once the sauce starts to get thick, cook your halibut and asparagus — these will cook for about the same amount of time. this way everything is ready to be eaten and nothing is cold.
Lobster Ravioli:
9oz pack fresh lobster ravioli (i bought mine at Costco.)
*if frozen, let thaw while preparing meal
Parmesan Crusted Halibut:
  • 2 halibut filets, 
  • 1/2 cup flour
  • 1/2 cup Panko breadcrumbs (you can use italian breadcrumbs instead)
  • 3/4 cup Parmigiano-Reggiano cheese, grated
  • 1 egg, beaten w/ a little milk or water
  • Seasoning - kosher salt, lemon pepper, granulated garlic or garlic powder, dried parsley, dried oregano, lemon-pepper
  • (I used Old Bay and pepper)
Season the halibut on both sides. Allow the seasoning to penetrate the fish for 5 minutes.
Meanwhile, mix together the Panko and cheese together. Add dried parsley, dried oregano, granulated garlic (or garlic powder), black pepper. You don’t need to add salt to this because the cheese holds a considerable amount of saltiness already, but if you do add salt go easy.
Arrange 3 shallow dishes/bowls next to each other, with flour in the first dish, the beaten egg in the second dish, and the panko/cheese mixture in the last dish. 
Coat one piece of the seasoned halibut in the flour on both sides and shake off the excess.
Dip the flour coated halibut into the eggwash, on both sides, and let the big globs drip off for a second or two.
Toss the eggy/floury halibut into the panko/cheese mixture. Press the panko/cheese mixture into the halibut thickly and  well so that it’s evenly coated. 
Repeat with the next piece.
Place into the fridge for about 10 minutes. This allows the crumb coating to really adhere to the fish so that it doesn’t fall off in the hot oil.
When ready to pan fry, drizzle a very thin layer of extra virgin olive oil and 2 tbsp of butter into a skillet over medium high heat. Once the butter starts to foam and bubble up, this means it’s hot enough to fry.
Gently place your halibut into the skillet and cook until golden brown on both sides, about 5min per side.
Drain on paper towels and lightly season with a little salt while it’s still very hot.
Roasted Asparagus:
  • 1 bunch of asparagus
  • Extra virgin olive oil (the good stuff, if possible)
  • 2 to 3 tbsp butter
  • Salt, pepper, granulated garlic (or garlic powder)
Preheat oven to 450
Chop off the last 3 inches of your asparagus.
In a foil-lined baking sheet, arrange your asparagus in a flat layer. Drizzle with olive oil and top with tiny pieces of the butter.
Sprinkle salt and pepper over the asparagus and place into the hot oven for about 7-10 minutes. The result will give tender yet firm asparagus. You can cook yours longer if you like a softer asparagus. 
Remove from oven and serve immediately.
**You can also drizzle a little lemon juice or zest over the asparagus for added flavor.
Shiitake Mushroom Cream Sauce
  • 1 heaping cup shiitake mushrooms, sliced
  • 1 large shallot, chopped
  • 3 cloves garlic, chopped
  • 3 tbsp extra virgin olive oil
  • 3 tbsp butter
  • 2 1/2 cups heavy cream (a little over half a quart)
  • 1/2 to 3/4 cup parmigiano-reggiano cheese, grated
  • Dried herbs: parsley, oregano, basil
  • Salt, pepper, etc.
In a large skillet over medium heat, drizzle in olive oil. Once olive oil is heated, add butter. When butter is bubbly/foamy, add chopped shallot and let sweat for about 3 minutes.
Add sliced shiitake mushrooms, season with salt and pepper. Allow this to cook until mushrooms are softened, about 10 minutes.
Add garlic and let cook for an additional 5 minutes. Be careful not to burn garlic, if it starts to toast too quickly, reduce the heat.
Add heavy cream, cover and bring to a rapid boil.
Reduce heat to medium/medium low for a slow simmer for about 5 minutes. Keep it covered.
Add fresh ravioli and stir until evenly coated. Cover and continue a soft simmer until sauce coats the back of a spoon or is starting to coat the sides of the skillet. The fresh ravioli will cook very quickly and doesn’t need to be boiled first. The starch from the pasta will also help thicken the sauce up. Taste and season accordingly. Once the sauce is perfectly thickened yet still very creamy, sprinkle in cheese, stir and remove from heat. Let sit for about 2-5 minutes to get happy.
Arrange Ravioli with Halibut filets on top drizzled with the sauce with asparagus to the side - all with a glass of amazing wine :)

Friday, December 7, 2012

Aspens in High Key Harmony


I actually started this one before the Cattail Series, but after the initial drawing and block-in, I had to put it away due to my "attention deficit".  I knew it would speak to me again at some time!  Well, today was the day.  It was always going to be a high key painting but I've got more contrast than I had intended.  Sometimes they just have their own personality and I have to listen.

Thursday, December 6, 2012

Calendars available December 14, 2012


Once again, I have had a small quantity of calendars made for the New Year.  It contains my favorite paintings done from this last year.  They are $25 for one or $20 for two and going fast!  Please give me a call or email if you are interested in one!

Call 801-389-2369 or email shankunz@earthlink.net

Saturday, December 1, 2012

Newest Series - Cattails from Ogden Valley


The paintings in this series are of the Ogden Valley during the month of November.  I LOVE this time of year, where the naples and ochres whisper quietly but powerful!  This particular series is less about the trees than it is about the layers of land and the soft palette.  They are painted on a gessoed hardboard surface with much paint and a palette knife to push the abstract feeling I am looking for.  My plan is to recreate them in a much larger size, softer and on linen.  We shall see what we shall see!

Thursday, November 15, 2012


A 10 Step Approach to Develop a Series of Exhibition Paintings

snow covered landscape paintingA lot of thought and exploration goes into developing a series of paintings for an art exhibition.

Today, this has been a topic of conversation between my good friend and fellow artist, Shanna Kunz and me. This weekend, Shanna and I are exhibiting together in an all women art show, “8 Broad Brush Stokes”. (Come see us in Utah, November 16-17).
Shanna and I love to talk ‘shop’ when we are together. Today, we have been discussing the importance of producing a cohesive body of paintings for each of our upcoming winter exhibitions.
Shanna and Lori in Maine in October
I was really impressed with Shanna’s clear 10 step approach to developing a series of exhibition paintings. Shanna is a landscape painter, but these steps could be applied toward any painting subject.
One
The first step is to decided upon a theme.
For example: For a landscape painter, the theme might be a regional location, or a season, or you might choose to focus on abstraction, or paint quality.


To Read more of Lori's blog or see her amazing blog: http://www.finearttips.com/2012/11/10-steps-to-develop-a-series-of-exhibition-paintings/#ixzz2CMYMnEOD

Monday, October 22, 2012

The French Onion Soup that went with the Pork Roast!


I used Swiss Cheese and Smoked Gouda Cheese and a Cab Red wine instead of Sherry and a dash of Worchestershire Sauce and a couple of beef bouillon cubes - made it richer.  So delicious!!!!


Oh So Good French Onion Soup

Recipe courtesy Rachael Ray
Prep Time:
10 min
Inactive Prep Time:
--
Cook Time:
25 min
Level:
Easy
Serves:
4 servings

Ingredients

  • 1 tablespoon extra-virgin olive oil
  • 2 tablespoons butter
  • 6 medium onions, thinly sliced
  • Salt and freshly ground black pepper
  • 2 teaspoons fresh thyme, picked and chopped or poultry seasoning
  • 1 bay leaf, fresh or dried
  • 1/2 cup dry sherry
  • 6 cups beef stock
  • 4 thick slices crusty bread, toasted
  • 2 1/2 cups shredded Gruyere or Swiss cheese

Directions

Heat a deep pot over medium to medium high heat. Work next to the stove to slice onions. Add oil and butter to the pot. Add onions to the pot as you slice them. When all the onions are in the pot, season with salt and pepper and 1 teaspoon fresh thyme. Cook onions 15 to 18 minutes, stirring frequently, until tender, sweet and caramel colored. Add bay leaf and sherry to the pot and deglaze the pan drippings. Add 6 cups stock and cover pot to bring soup up to a quick boil.
Arrange 4 small, deep soup bowls or crocks on a cookie sheet. Preheat broiler to high. Once soup reaches a boil, ladle it into bowls. Float toasted crusty bread on soup and cover each bowl with a mound of cheese. Sprinkle remaining fresh thyme on cheese and place cookie sheet with soup bowls on it under hot broiler until cheese melts and bubbles.

Wonderful Autumn Meal!

Pork Roast with Apples and Caramalized Onions

First Caramalized onions:

Caramalized Onions
Two large sweet onions, sliced thin
1 tbsp minced garlic
1 tbsp brown sugar
generous salt & pepper
Two Tbsp Olive Oil, two tbsp. Butter
Saute the onions, garlic, brown sugar, S&P in the oil and butter until the onions are rich and golden, at least 30", stirring constantly. 

Found this part on this great cooking site:  http://thepioneerwoman.com/cooking/

Pork Roast with Apples:

3 Tablespoons Olive Oil
1 whole Pork Shoulder Roast (also Called Pork Butt)
Salt And Pepper, to taste
4 cups Apple Juice
1 cup Beef Stock
3 whole Apples, Cored And Cut Into Wedges
3 whole Medium Onions, Sliced
1 whole Bay Leaf

Wild Rice
2-1/2 cups Wild Rice
4 cups Water
3 cups Chicken Stock
1/2 stick 4 Tablespoons Butter
1/2 cup Chopped Pecans
Preparation Instructions

OPTIONAL: Saute onions until brown. (Or you may just add them raw to the roast.)
To make the pork roast, heat olive oil in a large pot over high heat. Salt and pepper pork roast, then sear on all sides to give it some color. Reduce heat to low. Add apple juice, apple slices, onions, and bay leaf. Cover and simmer for 3 hours. (Or you may place in a 300 degree oven if you prefer.)
Toward the end of the cooking time, make the rice: melt butter in a medium saucepan. Add pecans and saute for a couple of minutes. Add wild rice and liquid, then bring to a boil. Reduce heat to low, cover, and cook until all liquid is cooked out.
When the roast is done, remove the roast, apples, and onions to a platter. Raise heat to medium-high (to high) and boil liquid, reducing it until thick and rich.
Spoon thick sauce over the roast, then cut the roast into slices. Serve with apples, onions, and wild rice.
(Note: add fresh thyme or rosemary to the roast before cooking if you have it on hand!)

Sunday, October 7, 2012

A Traveling Life!


Whewhhhhhh..... That was a fast summer!  I just got back from an intense and amazing workshop in Maine and realized I was totally exhausted.  I started tracking my summer miles this year starting with May in Austin, TX to see Marco's boys.  Next was Los Angeles to see my daughter with my other daughter and two of my grandchildren, home for a few weeks and off to shows in Sun Valley, Jackson and finally Maine - all the while painting away.  No wonder I'm tired!!! I didn't even really get to enjoy my garden the way I usually do - well, maybe this is more usual than I give it credit for.  The workshop was so inspiring I can't wait to get back to the easel again :)

For anyone that has ever been interested in taking the workshop from T. A. Lawson, I'll tell you it was the most intense and inspiring week that I can remember in all of my art career!  He is an incredible artist and equally as incredible a teacher - not for the Sunday painter - for those truly looking for their voice and willing to work hard for it.  He and his entire family, especially his beautiful and accomplished writer/wife Dorie,  give generously of their time and efforts to all. He took us to wonderful locations to paint and opened his farm to us on the last day to paint horses, sheep, chickens, dogs, barns, and a plethora of beautiful Maine coastal and tree-filled landscapes.  I cannot even put to words the experience of all I learned - hopefully it will show in my next body of work.  And did I mention new friends?  I stayed in a three bedroom late Captains house right on the shore of Rockport with Lori and two new best friends, Jerolyn Dirks and Nancy Becker.  We stayed up late every night talking art, rehashing the lessons of the day and other art business and looking at art history on the internet.  Needless to say, we were all the best of friends by the time the week was over.  Now we'll Skype while we work to stay in touch.  

So back to work I go.  Color charts are coming (linen on the way via UPS) and sketchbooks in hand.  I came back with the attitude of "from this day forward".  I'm trying a new way of working, a new routine to see what changes come about in my work.  I do feel like I was already heading in that direction, my priorities not necessarily based on technical proficiency - more on the heart and attachment.  Who knows, maybe it will come through and maybe I'll come short of my expectations but I will try, try, try again!  This little engine will keep going :)  Maybe a more mature composition and more mature color choice are on their way!

Saturday, September 15, 2012

For all of my artist friends!


Tuesday, September 11, 2012

It's about time!

It's been awhile (and a show) since I sat down and blogged.  I thought I might catch up on the adventures of the last few weeks!
Marco and I took the watercolors to Sausalito last week.  It's been quite some time since I had done an art festival and I was pretty anxious, but so proud of the work I was bringing down.  I worked night and day for over a month to get them together.  If you remember, I was really changing directions with the oils, going more abstract and much more painterly than previous work.  Going back to watercolors has the tendency to ground me, bring me back to center and I think they did again this time - though I can't wait to jump back in that direction again.  Tony from Rocky Mountain Frames designed and hand-crafted the most beautiful Arts and Craft period frame for me.  It was simple and elegant and the reviews were excellent!  I even replicated a Percy Gray-style frame, hinged into a triptych and it was so beautiful.  Be sure and look up his frames, his workmanship!  He will develop a frame style specifically for your work or from his choice of his designs.  rockymountainframes.com.  I'm loving his floated frames these days :)
We had all day to set up the booth on Thursday - funny, it took all day!  Seems like the more time you have, the more time you take.  We have such a great time together though that I enjoyed every minute of it.  The setup at Sausalito is quite organized, very well run.  They treat their artists so well and the volunteers are AMAZING!  Here is a pic of the booth....


The show started on Friday evening.  I had no idea it was going to be such an elegant affair!  Black tie and formals.  A few collectors wandering, but most were there for the gala.  Saturday morning at 9am was when the crowds started showing up.  The music acts were great - a little bit of something for everything (Hermans Hermits and The Fix).  I took a break and went over to the stage to see a few minutes of almost all of the bands.  And did I tell you about the margaritas?  Yummy!  
There was some amazing art at the show - love the work of my friend Aaron Bushnell, Santiago Michalek (and his beautiful wife), Brian Blackham - all Utah artists, Richard Hall and a few more celebration artists and so many more talented artists.  I only wish I had more time to really spend time looking at the art, but there were so many people there I didn't spend much time out of the booth.  
One of our favorite parts of the trip was a great little retro restaurant called Marin Joe's.  Food was EXCELLENT, the service was even better.  Our waiter Seth, made sure we tried the best on the menu and we appreciated his advice!  What a cool place - I recommend it highly.  Oh, and a coffee shop right in Sausalito very close to the festival - can't recall the name, but it was the best coffee in California!  We went back three times :)  We even eventually got used to the not-so-elegant hotel we stayed in, sans the night with the police and the girl that jumped out of the window :)  
It's good to be home and I'm looking forward to the Western Visions Show in Jackson,WY and the KAWA women's paintout this week.  And then on to the workshop with T. A. Lawson in Maine.....
Will keep you posted - going to be an amazing month!!!!


Monday, August 13, 2012

Saturday, August 11, 2012

Texas Slow Cooked Brisket

So it's been a REALLY long time since I posted a recipe, but I'm cooking again.  My favorite thing to do after a show is over (I still am painting for another show, but I MUST cook).  I have not tried this recipe and if it's a disaster I'll let you know.  It's supposed to be the closest to Rudy's brisket so we'll see!


Texas Slow-Cooked BBQ Brisket 


After you've given this brisket a quick sear on the grill, the oven does all the work. Sighs of pleasure usually accompany the first bites of this meltingly tender, juicy, slightly smoky beef. Serve it with or without a barbecue sauce. Leftovers, if there are any, make fine Texas-style hash studded with red and green peppers and potatoes or barbecue sandwiches.


2 supermarket briskets at 4 or 5 pounds each or a custom-cut "double brisket," 8 or 9 pounds, trimmed of excessive fat

Marinade (Quantities are generous. Halve the recipe if total brisket weight is less than 6 pounds):
1 cup Worcestershire sauce
1 cup red wine
1 can (14 ounces) beef broth
Few drops liquid smoke seasoning (if you wish to enhance the natural smoke and are not using a smoky barbecue sauce)
Juice from 2 limes
4 tablespoons brown sugar
1/4 cup chopped parsley
6 green onions, white and green parts, chopped
1 tablespoon salt
1 tablespoon coarsely ground black pepper
4 cloves garlic, chopped
2 serrano chiles, stemmed and halved
1/4 cup barbecue sauce, such as Bulls Eye or a homemade sauce, recipe follows (optional)

For finishing:
Oil for searing
2 tablespoons barbecue sauce such as Bulls Eye or a homemade sauce
2 tablespoons butter at room temperature
Salt
Pepper
Tender greens or watercress and red-leaf lettuce for garnish


Three days ahead of time, put the brisket, fat side up, in a large pan at least 2 inches deep or a heavy-duty plastic bag. Combine the marinade ingredients and pour over the brisket. Cover or seal tightly and marinate for 30 to 36 hours.

Preheat an outdoor grill. Remove the brisket from the marinade (reserve marinade) and rub with oil. Sear on the grill, fat side down, for 8 to 10 minutes. Turn and sear the opposite side for 8 to 10 minutes.

Preheat the oven to 200 degrees. Lay out several overlapping sheets of heavy aluminum foil large enough to enclose the brisket completely. If you are using two briskets, lay one on top of the other. Pour about 1/2 cup of the marinade over the meat, then wrap securely in foil. Refrigerate the remaining marinade for another use within a week or freeze for longer storage. Put the brisket(s) in a roasting pan and place in the center of the oven. Roast, undisturbed, for 8 hours.

After 8 hours, remove the brisket. Let it stand 10 minutes, then pour off and reserve the juices. Cover the brisket lightly with foil to keep it warm. You may not wish to use all the juice. If you want a real barbecue sauce taste, stir in 1/4 cup barbecue sauce to taste and cook a few minutes more. If you prefer the natural juices to dominate, add 1/2 cup of reserved marinade to the juices and boil 10 to 20 minutes to reduce and thicken. Then whisk in the 2 tablespoons of barbecue sauce and 2 tablespoons soft butter. Season to taste with salt and pepper. 

Slice brisket diagonally across the grain about 1/3-inch thick. Arrange slices overlapping on a warm platter, with garnish of greens around edge. Moisten with juices. Pass additional juices. A 10-pound brisket, or two smaller ones totaling 10 pounds, serves about 16.

Rudy’s
makes about 2 cups
  • 1 (8 oz) can tomato sauce
  • 1 cup ketchup
  • 1/2 cup brown sugar
  • 2 1/2 tbsp white vinegar
  • 2 tbsp Worcestershire sauce
  • 1/4 cup lemon juice (2 lemons)
  • 1 tsp garlic powder
  • 1 tsp course black pepper
  • 1/4 tsp cumin
  • 1/8 tsp cayenne pepper
  1. Combine all ingredients in a large pot.  Simmer until slightly reduced.